Home Kubernetes cluster
Want to learn and/or experiment with kubernetes but minikube is not enough? Then the best way is to have a real cluster of your own. On your home PC, out of charge.
All you need is some basic Linux knowledge and a PC with at least 6GB of RAM.
The setup in this post uses virtual machines for the cluster nodes, run by Oracle VirtualBox.
The OS of the nodes is Ubuntu Server 22.04.
The version of Kubernetes is 1.24.3.
It was tested on a Windows 10 Host (but should work on any OS, supported by Oracle VirtualBox).
Create a virtual machine and install Ubuntu Server
Install Oracle VirtualBox, if not already done so and create a VM with 2 CPUs and (at least) 2GB RAM. Install Ubuntu Server on it. Here are the steps in detail:
1. Create the VM, name it "kube01". This will be the control-plane node.


3. Create a virtual hard disk.

4. Select VDI as type.

5. Choose dynamically allocated size.

6. Select 20GB for size and finish the wizard.

7. Edit the created virtual machine and set the CPUs to 2 under System - Processor.

8. For easier access, change the network adapter to bridged under Network.

9. Download the .ISO image of Ubuntu Server and load it in the optical drive, under Storage - Controller: IDE.

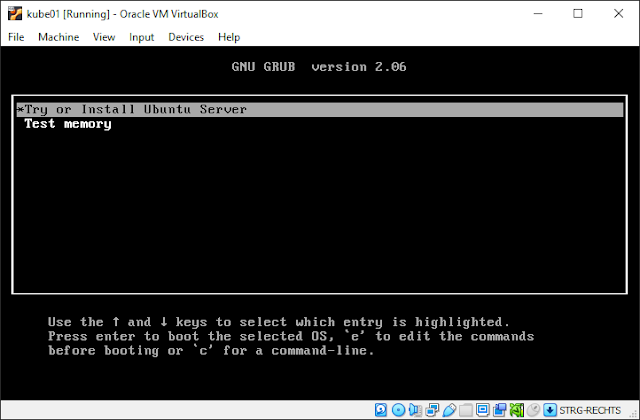
10. Start the virtual machine (normal start). Select "Try or Install Ubuntu Server" when loaded. Choose your language and desired keyboard layout.
11. Select "Ubuntu Server" as type of install.

12. Confirm the IP settings, proxy (empty), the mirror, use the entire disk space and confirm the file system summary.

13. Confirm the "destructive action" 😀

14. Type in your name, server's name, username and password.

15. Install OpenSSH server. It makes it much easier to work with the VMs later. If you have a github account with a SSH key, you can directly import it for a passwordless access.


17. Start the installation and reboot when it's finished. You will get a message to eject the CD and possibly an error saying that "it could not be ejected automatically". Just press Enter.

Install Containerd
Starting from version 1.24 Kubernetes dropped the support for dockershim and although there are multiple possibilities for the container runtime, Containerd being the runtime within Docker itself is the most popular choice.Connect over SSH to the virtual machine and execute the commands below:
$ sudo apt-get update
$ sudo apt-get install \
    ca-certificates \
    curl \
    gnupg \
    lsb-release

$ sudo mkdir -p /etc/apt/keyrings
$ curl -fsSL https://download.docker.com/linux/ubuntu/gpg | sudo gpg --dearmor -o /etc/apt/keyrings/docker.gpg

$ echo \
  "deb [arch=$(dpkg --print-architecture) signed-by=/etc/apt/keyrings/docker.gpg] https://download.docker.com/linux/ubuntu \
  $(lsb_release -cs) stable" | sudo tee /etc/apt/sources.list.d/docker.list > /dev/null

$ sudo apt-get update
$ sudo apt-get install containerd.io

$ sudo mkdir -p /etc/containerd
$ containerd config default | sudo tee /etc/containerd/config.toml
Edit the file /etc/containerd/config.toml and set SystemdCgroup = true under [plugins."io.containerd.grpc.v1.cri".containerd.runtimes.runc.options]
After that, restart containerd:
$ sudo systemctl restart containerd
Install Kubernetes
$ sudo su -

$ curl -s https://packages.cloud.google.com/apt/doc/apt-key.gpg | apt-key add -

$ echo "deb http://apt.kubernetes.io/ kubernetes-xenial main" | sudo tee /etc/apt/sources.list.d/kubernetes.list > /dev/null

$ apt-get update
$ apt-get install -y kubelet kubeadm kubectl
$ apt-mark hold kubelet kubeadm kubectl containerd
Note that here we put the packages on hold. This is to prevent updating them while updating other packages with apt, because the upgrading of kubernetes requires multiple steps. More information here.
Install go and use it to get crictl and network cni plugins
$ curl -O https://storage.googleapis.com/golang/go1.8.linux-amd64.tar.gz
$ tar -xvf go1.8.linux-amd64.tar.gz
$ rm go1.8.linux-amd64.tar.gz
$ mv go /usr/local
$ echo "export GOROOT=/usr/local/go" >> ~/.profile
$ echo "export GOPATH=\$HOME/go" >> ~/.profile
$ echo "export PATH=\$PATH:\$GOROOT/bin:\$GOPATH/bin" >> ~/.profile
$ source ~/.profile

$ go get github.com/kubernetes-incubator/cri-tools/cmd/crictl
Additional configuration
Turn off the swap:
$ swapoff -a
Also edit the file '/etc/fstab' and remove any lines about swap, e.g. something like this:
/swap.img none swap sw 0 0
Update the extra args of kubeadm:
sed -i "s/\$KUBELET_EXTRA_ARGS/\$KUBELET_EXTRA_ARGS\ --cgroup-driver=systemd/g" /etc/systemd/system/kubelet.service.d/10-kubeadm.conf
Configure CNI plugin
We are going to use the popular cni plugin Flannel. Here is how to configure it:
$ mkdir -p /etc/cni/net.d

$ echo '{
  "name": "cbr0",
  "cniVersion": "0.3.1",
  "plugins": [
    {
      "type": "flannel",
      "delegate": {
        "hairpinMode": true,
      "isDefaultGateway": true
      }
    },
    {
      "type": "portmap",
      "capabilities": {
        "portMappings": true
      }
    }
  ]
}' | sudo tee /etc/cni/net.d/10-flannel.conflist > /dev/null

$ echo '{
  "name": "cbr0",
  "cniVersion": "0.3.1",
  "type": "flannel",
  "delegate": {
    "isDefaultGateway": true
  }
}' | sudo tee /etc/cni/net.d/10-flannel.conf > /dev/null

$ systemctl daemon-reload
$ systemctl restart kubelet
$ systemctl restart containerd


$ modprobe br_netfilter
$ sysctl net.bridge.bridge-nf-call-iptables=1
$ sysctl net.ipv4.ip_forward=1
Also edit /etc/modules and add:
br_netfilter
Clone the Virtual Machine
At this point, it might be a good idea to clone the VM (full clone) and use the clone(s) as worker node(s). It will spare a lot of time (doing all the above again for each worker node), but it might also lead to tiny problems with the hostname and IP addresses. It is your call 😉
Init the cluster and configure the control-plane node
Execute the below ONLY on the control-plane node:
$ kubeadm init --pod-network-cidr=10.244.0.0/16 --apiserver-advertise-address=$CURRENT_OUTBOUND_IP --cri-socket unix:///run/containerd/containerd.sock

...
Your Kubernetes control-plane has initialized successfully!

To start using your cluster, you need to run the following as a regular user:

  mkdir -p $HOME/.kube
  sudo cp -i /etc/kubernetes/admin.conf $HOME/.kube/config
  sudo chown $(id -u):$(id -g) $HOME/.kube/config

Alternatively, if you are the root user, you can run:

  export KUBECONFIG=/etc/kubernetes/admin.conf

You should now deploy a pod network to the cluster.
Run "kubectl apply -f [podnetwork].yaml" with one of the options listed at:
  https://kubernetes.io/docs/concepts/cluster-administration/addons/

Then you can join any number of worker nodes by running the following on each as root:

kubeadm join 192.168.0.81:6443 --token fk9jhp.asgvph8of59ss39x \
        --discovery-token-ca-cert-hash sha256:e6f8053ca8bfc1fc54caec4f74a15f74bb3d4b98d85ffd1ce00d5c9d17c81a3a
Save the link in the output. It will be required for the worker nodes.
If you are in su mode, exit it now and continue with your user. This will copy the kubectl config to your user and configure the network plugin:
$ exit

$ mkdir -p $HOME/.kube
$ sudo cp -if /etc/kubernetes/admin.conf $HOME/.kube/config
$ sudo chown $(id -u):$(id -g) $HOME/.kube/config

$ kubectl apply -f https://raw.githubusercontent.com/coreos/flannel/master/Documentation/kube-flannel.yml
Finally, verify the cluster - nodes and pods:
$ kubectl get nodes -o wide

NAME     STATUS   ROLES           AGE     VERSION   INTERNAL-IP    EXTERNAL-IP   OS-IMAGE           KERNEL-VERSION      CONTAINER-RUNTIME
kube01   Ready    control-plane   4m15s   v1.24.3   192.168.0.81   <none>        Ubuntu 22.04 LTS   5.15.0-43-generic   containerd://1.6.6

$ kubectl get pod -A -o wide

NAMESPACE      NAME                             READY   STATUS    RESTARTS   AGE     IP             NODE     NOMINATED NODE   READINESS GATES
kube-flannel   kube-flannel-ds-dh8pf            1/1     Running   0          24s     192.168.0.81   kube01   <none>           <none>
kube-system    coredns-6d4b75cb6d-k7nsh         1/1     Running   0          4m7s    10.244.0.3     kube01   <none>           <none>
kube-system    coredns-6d4b75cb6d-t6s7d         1/1     Running   0          4m7s    10.244.0.2     kube01   <none>           <none>
kube-system    etcd-kube01                      1/1     Running   0          4m20s   192.168.0.81   kube01   <none>           <none>
kube-system    kube-apiserver-kube01            1/1     Running   0          4m21s   192.168.0.81   kube01   <none>           <none>
kube-system    kube-controller-manager-kube01   1/1     Running   0          4m21s   192.168.0.81   kube01   <none>           <none>
kube-system    kube-proxy-7t944                 1/1     Running   0          4m7s    192.168.0.81   kube01   <none>           <none>
kube-system    kube-scheduler-kube01            1/1     Running   0          4m21s   192.168.0.81   kube01   <none>           <none>
Configure the worker nodes - join the cluster
If you cloned the virtual machine, start the clone, change the hostname and make sure it has a valid IP address (not the same like the control-plane node).
If you didn't clone it, create a new virtual machine and follow the steps above again.
Copy and paste the join command from the output of "kubeadm init", executed above on the control-plane node. It looks like this:
$ sudo kubeadm join 192.168.0.81:6443 --token fk9jhp.asgvph8of59ss39x --discovery-token-ca-cert-hash sha256:e6f8053ca8bfc1fc54caec4f74a15f74bb3d4b98d85ffd1ce00d5c9d17c81a3a

...
This node has joined the cluster:
* Certificate signing request was sent to apiserver and a response was received.
* The Kubelet was informed of the new secure connection details.

Run 'kubectl get nodes' on the control-plane to see this node join the cluster.
In case you lost it, you can get it again by executing this on the control-plane node:
$ kubeadm token create --print-join-command
Verify the new node by executing this again on the control-plane node:
$ kubectl get nodes -o wide
NAME     STATUS   ROLES           AGE   VERSION   INTERNAL-IP     EXTERNAL-IP   OS-IMAGE           KERNEL-VERSION      CONTAINER-RUNTIME
kube01   Ready    control-plane   45m   v1.24.3   192.168.0.81    <none>        Ubuntu 22.04 LTS   5.15.0-43-generic   containerd://1.6.6
kube02   Ready    <none>          51s   v1.24.3   192.168.0.132   <none>        Ubuntu 22.04 LTS   5.15.0-43-generic   containerd://1.6.6
Do this for all worker nodes, that you need.
Congratulation! Your new home k8s cluster is up and running! Enjoy it!